PreCache NetInjector Documentation Center : PreCache NetInjector Administration
Configuration
|
|
PreCache NetInjector Documentation Center : PreCache NetInjector Administration Configuration |
 |
 |
|
|
|
|
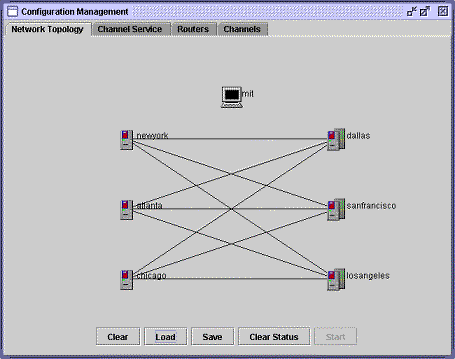
Network Topology — the physical network NetInjector routers move notifications along from point to point. Your NetInjector environment establishes links among routers, and manages these intelligently, so that notifications move efficiently. The Network Topology interface provides a view of your physical network; you can add routers and servers, as well as establish links among them. Create a router or server Your topology begins with the placement of routers and servers. As you develop your network, you can add routers to support new or expanding services.
Modify a router Your configuration must conform to the physical environment represented by the topological view. If you change the hardware's name or IP address, or entered the information inaccurately, you can modify the node in the topology, or remove it entirely.
Create the network Once you have defined the routers and servers for your network, you can create links among them. Create your links between stage one and stage two servers. For example, in the foregoing Network Topology, publisher routers appear on the left; subscriber routers are on the right. The routers are linked such that publishers served by newyork, chicago, and atlanta can publish notifications to subscribers served by dallas, sanfrancisco, and losangeles. Note: To maximize performance and ensure stability, do not create links between routers serving the same stage. Manage the network You can also use the Network Topology view of your network for fault management.
For daily router maintenance, use the Fault Management interface to check router status and to stop processes. |
|